Add an image
Every thumbnail should have an image, huh? Let's add it!
We add an Image component (imported from react-bricks) and we give a bit of style to the wrapperdiv, so that it becomes a real thumbnail:
// Thumbnail.tsximport React from 'react'import { types, Text, RichText, Image } from 'react-bricks'const Thumbnail: types.Brick = () => {return (<div className="my-6 mx-6 p-6 text-center w-1/3 border rounded-lg shadow-xl"><ImagepropName="image"alt="Fallback alt tag"maxWidth={200}imageClassName="mb-6"/><TextpropName="title"renderBlock={({ children }) => (<h1 className="text-2xl font-bold">{children}</h1>)}placeholder="Type a title..."/><RichTextpropName="description"renderBlock={({ children }) => (<p className="text-lg text-gray-500">{children}</p>)}placeholder="Type a description"allowedFeatures={[types.RichTextFeatures.Bold,types.RichTextFeatures.Highlight,]}/></div>)}Thumbnail.schema = {name: 'thumbnail',label: 'Thumbnail',getDefaultProps: () => ({title: 'Hello, world!',description: 'Lorem ipsum dolor sit amet.',// No default provided for the image => we'll do it later}),sideEditProps: [],}export default Thumbnail
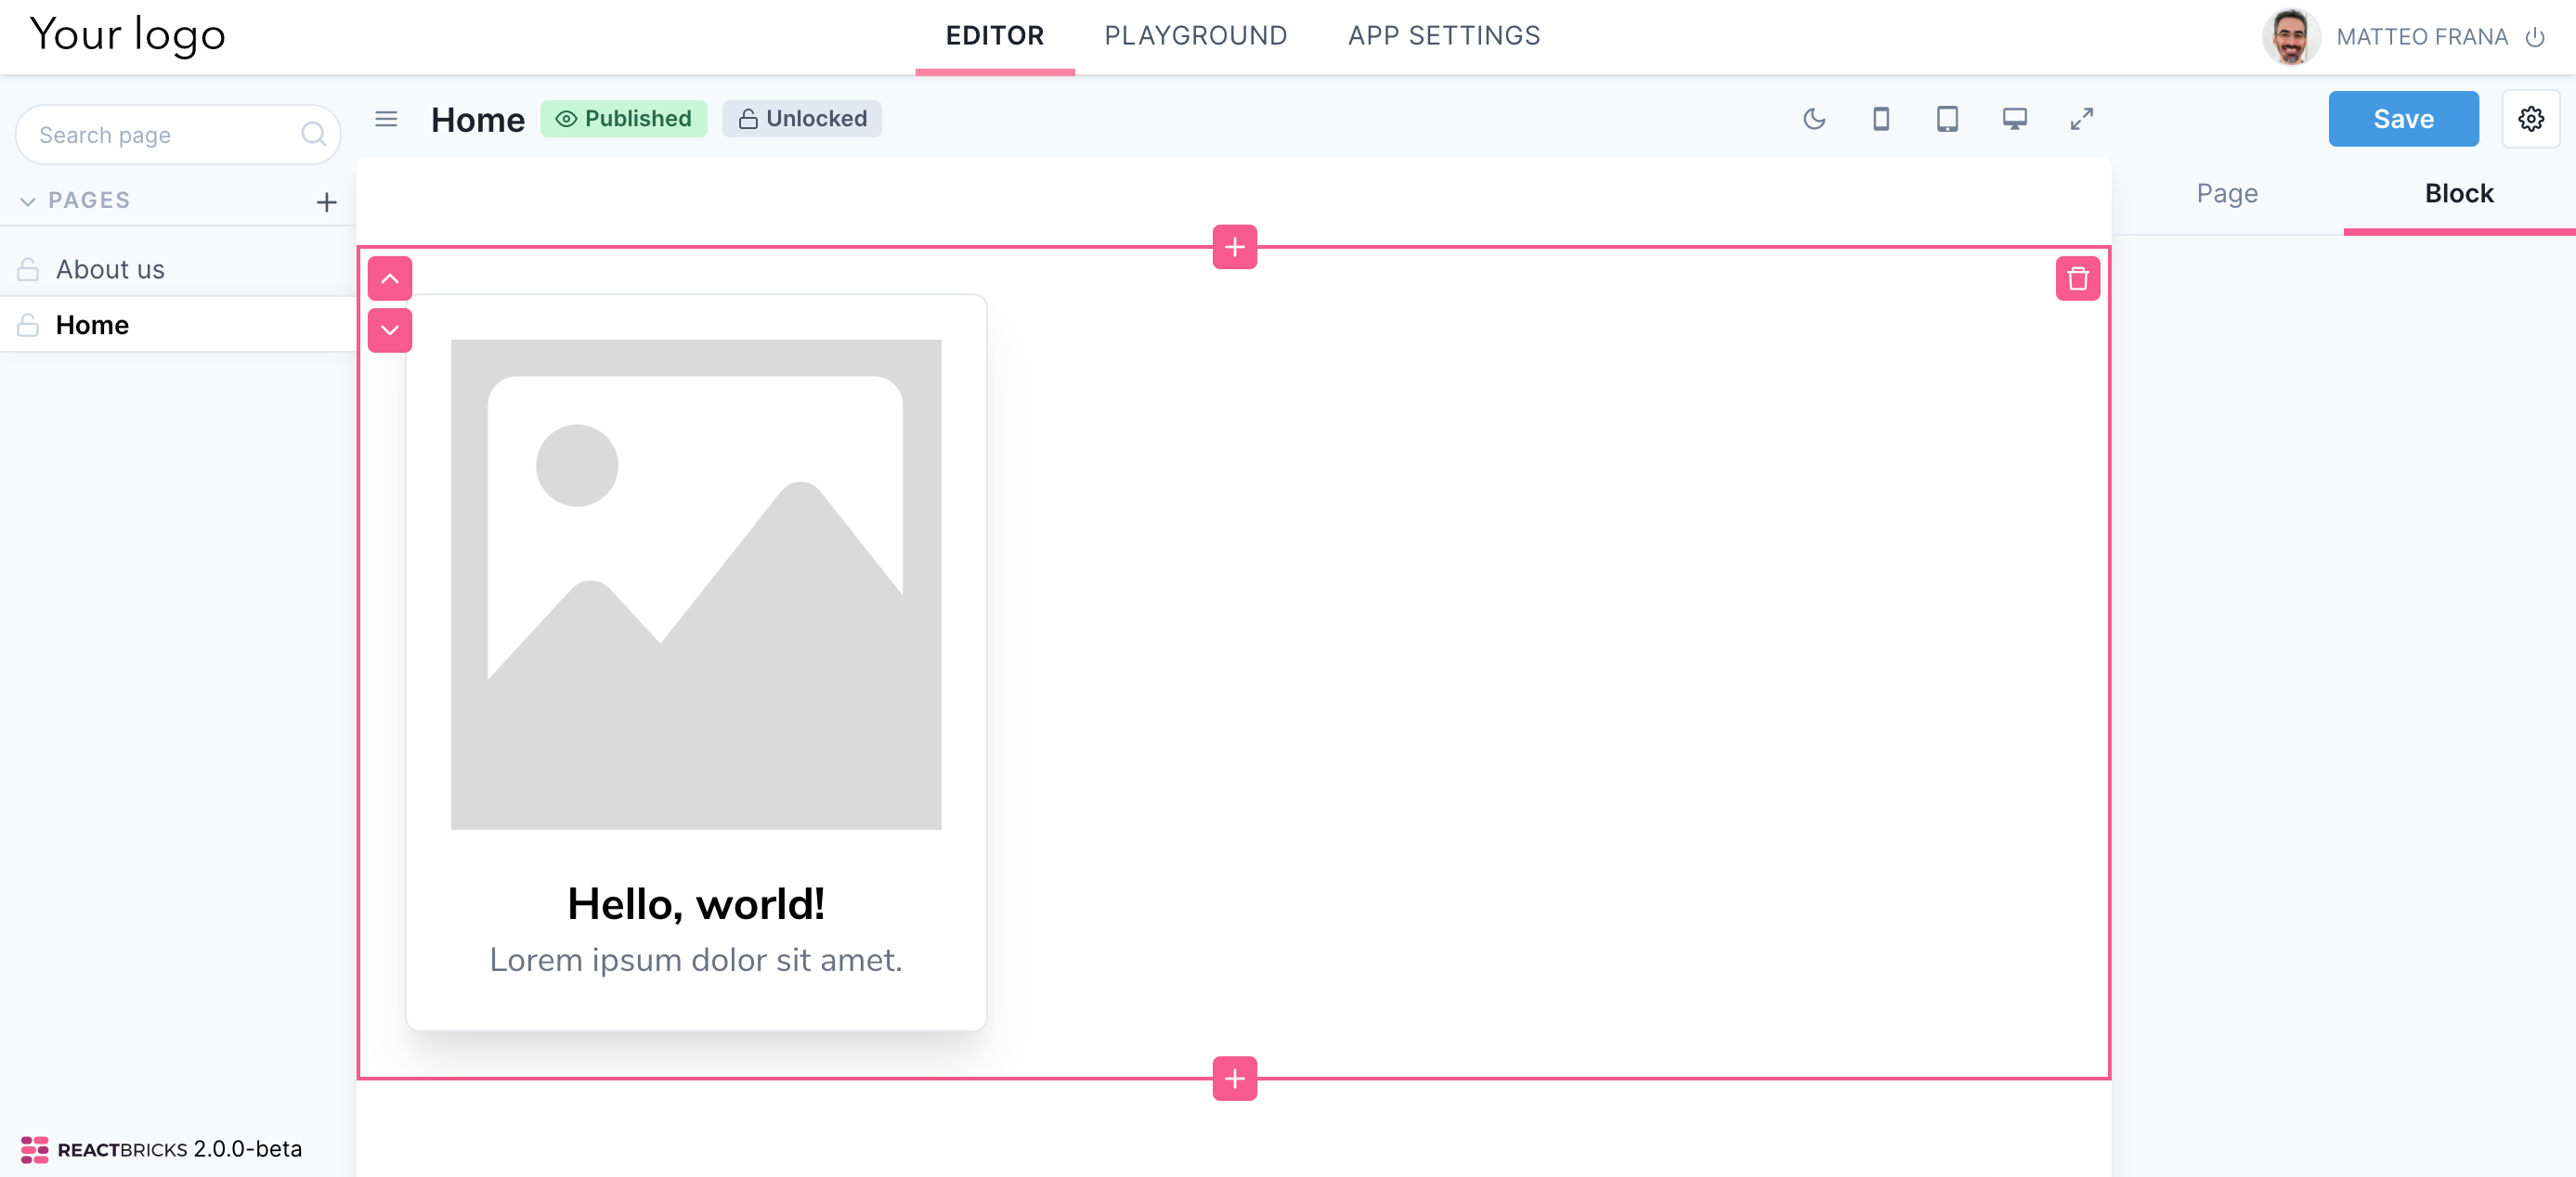
Now, if you add a Thumbnail block, you should see something like this:
Upload an image
Click on the image placeholder: a popup opens. Click on the image to change it and choose an image file from your computer: the image is uploaded. Then you can set an ALT tag and a SEO-friendly name for the final part of the URL. If you don't set any ALT tag, the fallback alt specified on the Image component is used instead.
Use the Playground to set a default image
The image placeholder you saw as you added the Thumbnail is the default image when no default value is configured via getDefaultProps(). To add a default value, we'll use the Playground.
You see that, beside the Editor tab, there is a Playground tab: click it.
The Playground is a sort of lab where you can experiment with all the available bricks.
Let's click on the Thumbnail brick from the left sidebar.
Now, you see that as you edit the content, you can see below the currently applied props.
This is very convenient to create the default content. You can tweak your props and visual content until you get a good default: then you may just copy the props and paste them inside the getDefaultProps function's return value.
So, let's do it: set a title and description, upload an image and copy the props into the getDefaultProps returned object. Now, that's our new default.
Image optimization
React Bricks optimizes your images as you upload them.
In particular, it creates responsive versions of each image and proper sourceSet to serve the best image based on the screen resolution.
It also creates a blurred low resolution version to load when the image is outside of the viewport. This technique il called "lazy loading": when the image enters the viewport, as the user scrolls down the page, the image is loaded and the low-res version is replaced by the real one. In this way, we don't load at all images which are not needed.
The maxWidth prop of the Image component tells our algorithm which is the maximum width at which the image is rendered on the screen. In this way React Bricks will create the biggest image at 2x this image size (for retina display).
The Image component has other props that we didn't see here. I suggest that you read the documentation for it.